Ever since I got my new phone, I’ve been on the hunt for a good pair of wireless earbuds. I finally decided on the Skullcandy Indy Wireless Earbuds and after reading a few tutorials online, I was able to get them up and running in no time! In this post, I’ll walk you through the simple steps of How To Pair Skullcandy Wireless Earbuds To Android as well as with Windows systems. Let’s get started!
How To Pair Skullcandy Wireless Earbuds To Android
Most of the Skullcandy earbuds are very easy to connect and they will automatically enter the pairing mode as soon as they are turned on. If your earbuds don’t seem to be connecting, make sure that they are in the pairing mode by checking the LED light.
Here are a few simple steps that you can follow in order to Pair your Skullcandy earbuds to your android phone:
1. Open the charging case and take out the earbuds.
2. Press and hold the power button on both earbuds until you see a white light flashing on each earbud.
3. Now open the Bluetooth settings on your android device and select “Skullcandy (model)” from the list of available devices.
4. Once the connection is established, you will hear a voice prompt saying “connected”.
5. That’s it! You can now start using your Skullcandy earbuds.
After following these simple steps, you should be able to easily connect your Skullcandy earbuds to your android device. But, if the issue still persists, as mine did, then you can try the following steps:
How to Troubleshoot Skullcandy Indy Earbuds:
1. Turn Off the Bluetooth mode of your Android Device
2. Power Off the Earbuds by Removing the Right Earbud from the case
3. Tap at the center of the Earbud “4” times (this will automatically turn off the earbud)
4. Place the earbud back into the Case
5. Repeat the same process for the left Earbud and Close the Case.
6. After 2 to 3 seconds Remove both the earbuds from Case
7. They will automatically turn “On” and enter into Pairing Mode (LED will start Flashing White)
8. At this point, You should listen to the voice “Pairing” from Earbuds
9. Now turn “ON” the Bluetooth mode of your Android Device Search for “Indy” on the available devices list and Click to Connect.
10. And that’s it! Your Skullcandy earbuds are now properly connected to your Android device.
Now, let’s move on and see how you can connect your Skullcandy earbuds to a Windows system.
How To Pair Skullcandy Wireless Earbuds To Windows
The process of connecting Skullcandy earbuds to a Windows system is quite similar to the one for Android. Just follow the steps below and you should be able to connect your earbuds in no time.
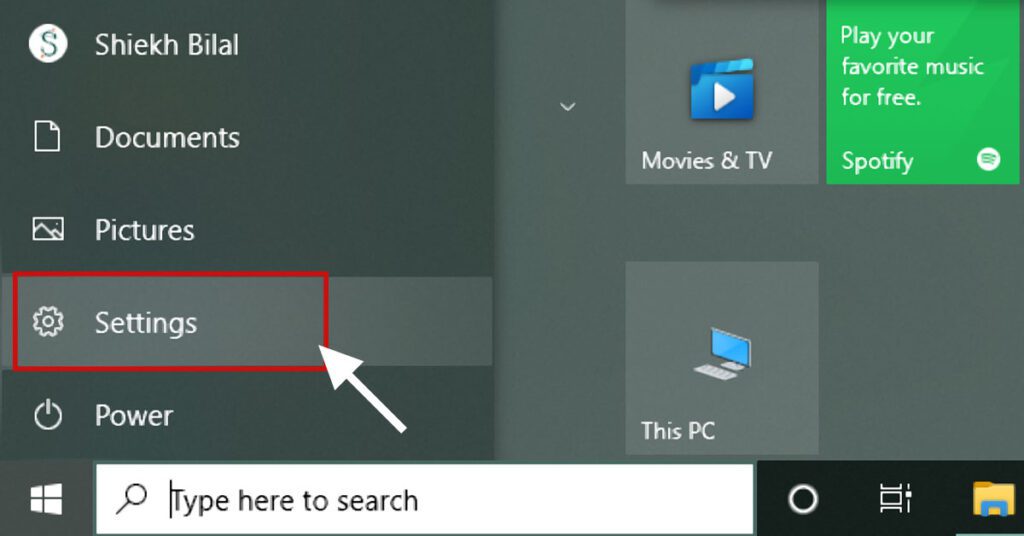
Go to the Settings of your PC by clicking the windows icon at the bottom left corner of your screen and then selecting the gear icon.
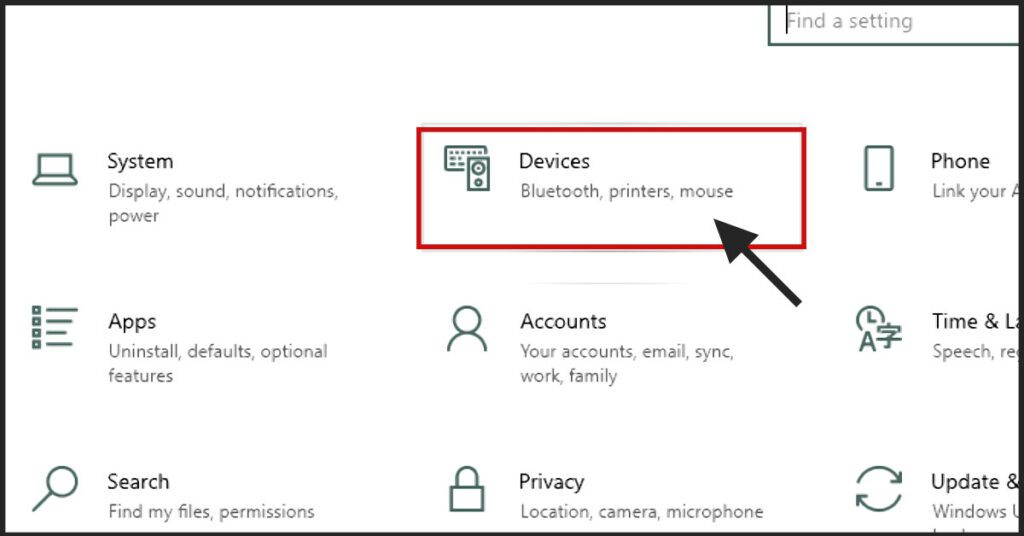
Now click on “Devices” and then select “Bluetooth & other devices” from the left sidebar.
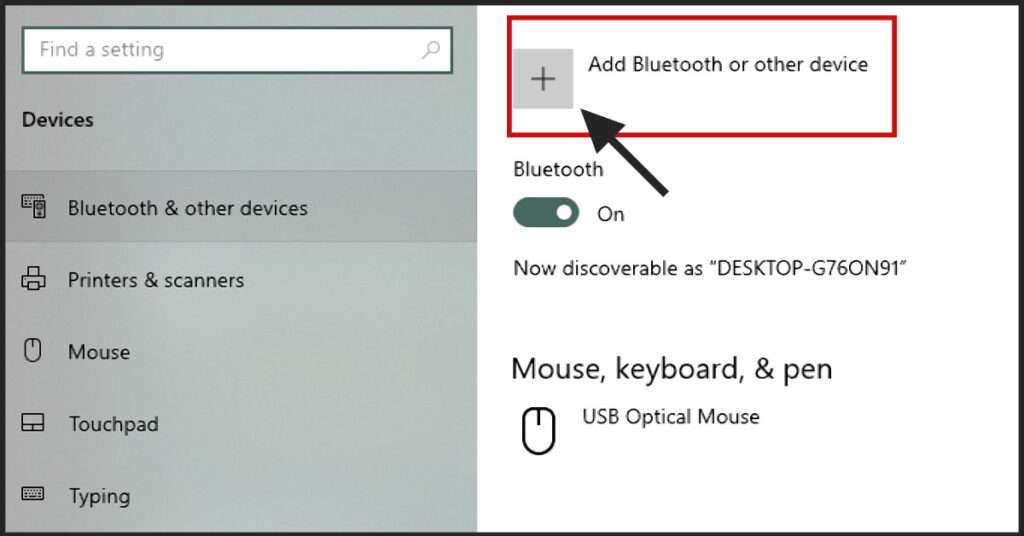
Click on “Add Bluetooth or other devices”.
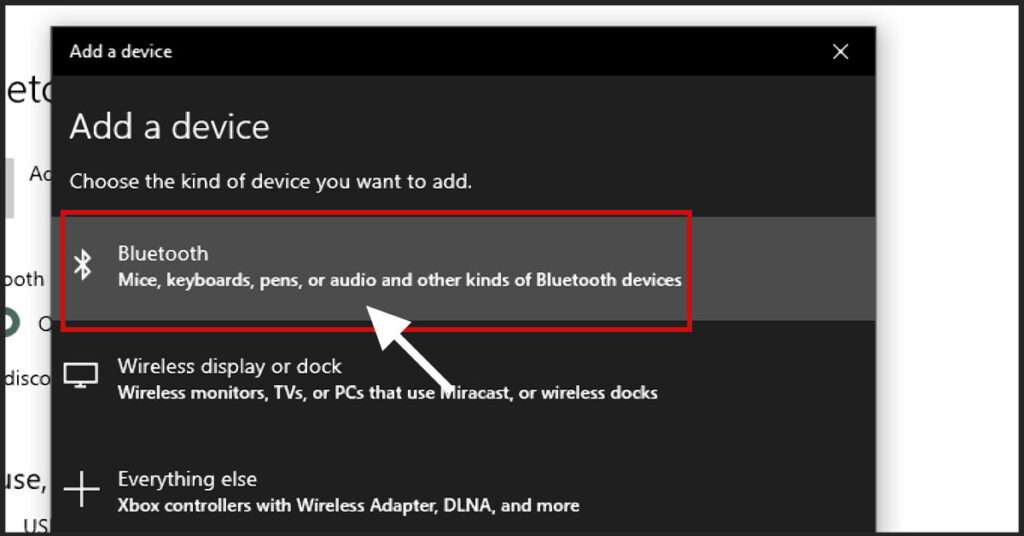
Now select “Bluetooth” from the popup menu.
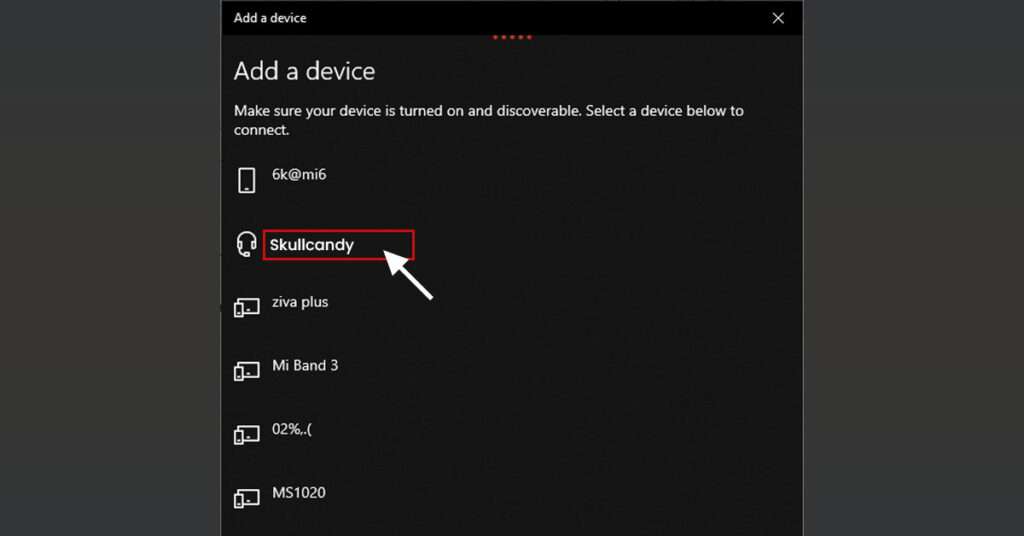
Your PC will now start scanning for available devices. Once your Skullcandy earbuds are visible in the list of available devices, click on them to connect.
That’s it! Your Skullcandy earbuds are now successfully connected to your Windows system.
Conclusion:
I hope this post helped you in successfully connecting your Skullcandy earbuds to your Android or Windows device. But if you are still facing any issues, Please read the FAQs below for more troubleshooting tips.
Please let me know in the comment section below if you have any further queries. I would be happy to help.
FAQs
- Charging Bluetooth Headphones During Use: Is It Possible? - January 9, 2024
- Why Over-Ear Headphones Best for Hearing Health? (7 Reasons) - December 12, 2023
- Fixing the Bose Earbuds Not Charging in Case Problem: Solutions That Work - November 24, 2023
